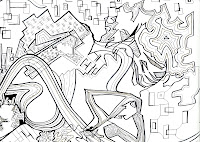
This is the image I decided to work on:

it is a fragment I scanned from my original drawing
I. Drawing a rectangular
1. [rec]
2. [0,0] - first corner
3. [36,24] - second corner
use zoom extent to see everything
1. [z]
2. [-]
3. [e]
4. [-]
II. Scale - 96
1. [sc]
2. [-]
3. [0,0]
4. [-]
5. [96]
we can check the size of the rectangle
1. [dl]
2. [-]
3. [0,0]
4. [select the opposite corner]
288/192 - the size of the rectangle
III. Add Image
1. [im]
2. [-]
3. [click on white space]
4. [attach image]
IV. Adjust the size of the image to the size of the rectangle
1. [sc]
2. [-]
3. [select image]
4. [96]
V. Its scale is 96, the same as the rectangle
VI. Highlight image - right click - draw order - send to back
now we can see the lines we are going to draw
VII. Line Layers
# - description of line, ex. 1 - earthy
No comments:
Post a Comment