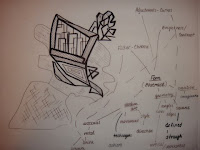
Friday, May 28, 2010

FINAL PRESENTATION PROJECT


Final Presentation Project

PDF format

11x17 (1-5 pages)

- character
- word maps
- singular verb words
- vision statement
- hand drawn sketches
- hand drawn - mid term
- written/broken thoughts on paper
- original visual objects
- words used from personal/cultural/historical point of views
- photoshoped objects
- visual vocabulary - Photoshop
- visual vocabulary - Autocad
- visual vocabulary - Google Sketchup
- original tracing 18x24 - Autocad
- 10 squares - Autocad (Powers of ten)
- 10 squares/10 modifications - Autocad
- 20x20 detail in plan, elevation and isometric views - Google Sketchup

Thursday, May 27, 2010

Working with 20x20 square in Google Sketchup

PLAN VIEW


ISOMETRIC VIEW


ELEVATION

Monday, May 17, 2010

prepare for 3D Modeling

And One More Square..............................

We are going to make a new square inside of one of the modified squares of the drawing.
Rename the file 18x24-3_2000 and save it to a different location.
[saveas]
[-]
We need to detach all images except the main drawing
[xref]
[-]
Bind - Insert - Detach all images

Draw a rectangle 20x20
explode command
[x]
[-]

Trim everything except the square
Extrim command


We are going to work with with square in Google Sketchup......................................
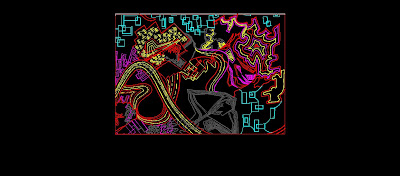
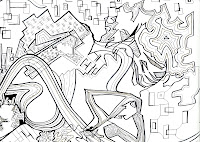
Final Drawing with Modified Squares
Paper space view

Model Space View


Wednesday, May 12, 2010

Modification of 10 squares

Modification of Ten Squares

Explode command to show the whole image
1. [x]
2. [-]
3. [select image]
4. [-]

Trim everything except the square
Extrim command

- 10 squares
- 10 compositions
- 10 actions of modifications

Some modification commands:
- Rotate
-Trim
- Extend
- Offset
- Copy
- Scale
- Stretch
- PE
- Spline
- Join
- Width
- Mirror
- Move
- Lengthen
------------------------------------------------------------------------------------------------------------------

Original Squares


Modified Squares

1.
- trim
- PE
- width
- stretch
- spline


2.
- trim
- stretch
- spline
- PE
- width


3.
- trim
- stretch
- PE
- spline
- width


4.
- trim
- copy
- mirror
- PE
- stretch
- width
- move
- rotate


5.
- trim
- spline
- PE
- stretch
- copy
- width


6.
- copy
- trim
- stretch
- PE
- width
- lengthen
- scale


7.
- trim
- stretch
- PE
- width
- copy
- spline
- lengthen
- move


8.
- trim
- stretch
- mirror
- lengthen
- copy
- PE
- width
- rotate
- move


9.
- trim
- stretch
- lengthen
- PE
- spline
- move
- scale


10.
- trim
- mirror
- rotate
- move
- stretch
- PE
- spline
- width
- scale

------------------------------------------------------------------------------------------------------------------
Scale command changes the size of the object you created
1. [sc]
2. [-]
3. [click to select]
4. [specify first corner]
5. [specify base point] - click on object
6. [specify scale factor] - type the desired size
If we type 2, the size will be twice as big as the original

Autocad uses base point as the position it moves the objects from. If we selected more than one item to move, these items will be moved the same distance, but the relative distance will remain the same.
------------------------------------------------------------------------------------------------
Now we need to add text to the final composition of 10 squares.
It needs to be done in Paper Space on a separate layer called "title".
Text Command:

1. [dt]
2. [-]
3. [j]
4. [m]
5. [click]
6. [type]

The size of the text should be 1/4''
move text using "move" command

Monday, May 10, 2010

Original composition

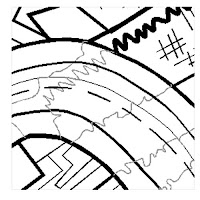
A composition from ten squares using Autocad commands:

- copy
- rotate
- move

We are not changing anything inside the squares, just arranging them in order to create a composition


Wednesday, May 5, 2010

10 squares inside each other


My Drawing with 10 squares inside each other


Now when we have 10 squares inside each other, we are going to save it 10 times. Each file should have one square left (10 different zooms).
Everything else around the square will be trimmed
----------------------------------------------------------------------------------------------------------
W - group
R - Copy w/Base Point - 0,0 - Delete
R - Paste as Block - Layer 0
Specify Location - 0,0

1. [xclip] - to set up image only inside the square
2. [-]
3. [click to select]
4. [-]
5. [-]
6. [-]
7. [select the square]
8. [-]

- xclip
- new boundary
- rectangle
- select the corners and enter

Repeat 10 times for all 10 files
----------------------------------------------------------------------------------------
Xref - a reference command
[xref]
[-]
- click on the file
- click on the "found at" location, 3 dots will show up
- find the path you want to save it on disk S in your folder
---------------------------------------------------------------------------------------
[mv] - magnification command

Wednesday, April 28, 2010

the idea of zoom


Movie "Powers of Ten: A Film Dealing with the Relative Size of the Universe"

Main Elements of the movie:

Zoom - magnify
Scale
Parts to the whole
Line weights
Limits - cone of vision (square)
Levels - structures

Zoom structure and idea of modification
Drawing diagram of the movie

10 Squares

Now we are going to make 10 squares inside of each other with 5' distance between them

I. Drawing a rectangular
1. [rec]
2. [-]
3. [right click] - to specify the first corner
4. [-]
5. [100',100']
6. [-]

II. 10 inside each other
1. [offset]
2. [-]
3. [5'] - distance between squares
4. [click] - on the side of the square
5. [click] - inside of the square
repeat 10 times in order to get 10 squares inside each other

III. Move the square on the image
1. [m]
2. [-]
3. [select all]
4. [n]
5. [-]
6. [click inside of the square]
7. [move on the image]

IV. Save them 10 times

Wednesday, April 21, 2010

Final Drawing and Pen Settings

My completed image in Autocad (Model Space)


Now we are going to print it, so we need to set up pen settings
---------------------------------------------------------------------------------------
Pen Settings


www.arch52af09.pbworks.com/pen-settings

There are two drawing areas within an Autocad drawing, model space and paper space. All drawing or modeling done in Autocad is drawn in model space.
Layout1 and Layaut2 are two paper space views.
Paper Space is an area used in Autocad to plot (print) the drawing created in model space.

Change name Loyaut1 for Pen Settings

1. Install Pen Settings
- file
- plot style manager
- open folder on S drive and copy file pen settings
- go back to PS Man and paste

2. Page Setup Manager
- file
- page setup manager
- pen settings - modify
- check "display plot styles"
- printer HP 500
- paper size Arch C
- plot Style name "arch22apensettings.ctb"
- plot area - window
- scale 1:1 (never do fit to paper)
- OK

3. Plot

1. [plot]
2. [-]
3. pick page setup
4. preview

Monday, April 19, 2010

working with my image in autocad

Working with my Image in AutoCAD

This is the image I decided to work on:


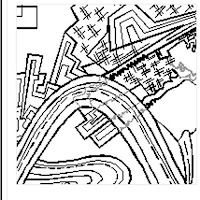
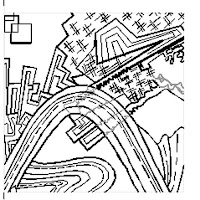
it is a fragment I scanned from my original drawing


I. Drawing a rectangular
1. [rec]
2. [0,0] - first corner
3. [36,24] - second corner

use zoom extent to see everything
1. [z]
2. [-]
3. [e]
4. [-]

II. Scale - 96
1. [sc]
2. [-]
3. [0,0]
4. [-]
5. [96]

we can check the size of the rectangle
1. [dl]
2. [-]
3. [0,0]
4. [select the opposite corner]
288/192 - the size of the rectangle

III. Add Image
1. [im]
2. [-]
3. [click on white space]
4. [attach image]

IV. Adjust the size of the image to the size of the rectangle
1. [sc]
2. [-]
3. [select image]
4. [96]

V. Its scale is 96, the same as the rectangle

VI. Highlight image - right click - draw order - send to back
now we can see the lines we are going to draw

VII. Line Layers
# - description of line, ex. 1 - earthy

Wednesday, April 14, 2010

Autocad commands

04.14.2010

Continue Working with AutoCAD (more commands)

Layer, color, line type

To Fade the Screen:
Modify - Object - Image - Adjust - select object - choose 75

F2 - contains all commands
F3 - snaps
pan - middle weel press down

QSAVE - quick saves the drawing, the easiest and quickest way to save
1.[qsave]
2.[-]

In order to find your saved working station, go to 3D Modeling at the bottom of the page and find your name

- polyline
[pl]
[-]
a polyline can be any shape and thickness

- arc

[a]
[-]

arc is also a type of polyline
1. [pl]
2. [-]
3. [click] - screen many points
4. [a] - arc
5. [-]
6. [s] - second point of an arc
7. [click] - third point
8. [l]
9. [-]

- width of a polyline

1. [pl]
2. [-]
3. [click first point]
4. [w] - width
5. [-]
6. [type start width]
7. [-]
8. [type end width]
9. [-]
10. [click on screen]
11. [-]

- to change the width of the existing polyline
1. [pe]
2. [-]
3. [select polyline]
4. [-]
5. [width]
6. [enter width]
7. [-]

- we can also join segments together
1. [pe]
2. [-]
3. [select pline]
4. [y]
5. [-]
6. [join]
7. [highlight everything]
8. [-]
9. [-]

Some Modification Commands


- trim
in order to trim something we need to select an object
after that we need to select the part of the object we want to trim
1. [tr]
2. [-]
3. [-]
4. [click objects]

- fillet
to make sharp corner
1. [f]
2. [-]
3. [r] - fillet radius (ex. 4'')
4. [-]

- circle
to draw a circle of any radius
1. [c]
2. [-]
3. [click]
4. [radius]

- array
this command creates copies of selected objects to a specified spacing
rectangular array (objects in rows and columns) or polar array (in circular pattern)
1. [ar]
2. [-]
3. [select rectangular array]
4. [select object]
5. [select the number of rows and columns]
6. [row offset and column offset]
7. [click OK]

Monday, April 12, 2010

Starting Autocad

04.11.2010

Starting AutoCAD

http://arch52af09.pbworks.com/Calendar

AutoCAD set up:
Autocad Classic

AutoCAD Commands:
-units

[units]
[-]
choose architectural unit type in the Drawing Units dialogue box

-limits (to set up drawing limits)
[limits]
[-]
lower left corner 0,0 (enter)
upper right corner 1000', 1000' (enter)

-undo
Autocad makes a history of everything we do and we can always go back.
We can go back by typing "undo"
[u]
[-]

-Tools/Options/Display/Crosshair size (75) or other desired size

- zoom extent
zoom to the extent of the entire drawing enabling a very quick overview of the project and an easy starting point to zoom into a more precise area of the drawing
[z]
[-]
[e]
[-]

-image
[im]
[-]
here we can attach or detach image, upload or reload

-layer
[la]
[-]
click white space to make a new layer
here we can change line type or color of the layer
colors 1-7 (1- lightest and 7- heaviest)
gray scale (250- darkest gray and 254 - lightest gray)

name layer 1-progress, change color to red

Drawing in Autocad

The command line appears at the bottom of the AutoCAD screen and displays the commands entered. Commands can be entered into the command line in text format, or by using the icons or drop down menus.

-line
different pieces, separate lines
[l]
[-]
-pline
one piece
[pl]
[-]
-erase
To erase any line
[e]
[-]
and select the object left click
right click to enter the command and delete the line

- rectangle
[rec]
[-]
[0,0]
[36,24]
first point is 0,0
second point 36,24

- distance
we can check the distance
[dl]
[-]
- scale
enter scale factor
[sc]
[-]
[all] -select an object
[0,0]
[96]

Scale:
12'' - 1
6'' - 2
3'' - 4
1 1/2'' - 8
1'' - 12
3/4'' - 16
1/2'' - 24
1/4'' - 48
1/8'' - 96
1/16'' - 192

Monday, April 5, 2010

04.05.2010
My character is Pablo Picasso. He is a Spanish painter and sculptor. He was involved in the Cubism Movement and the beginner of abstract art. Cubism is devided into Synthetic cubism and Analytical cubism. His works are popular by use of simple geometric shapes to represent objects so the viewer is able to look at them from different viewpoints. The main characteristic of the Analytical cubism is the use of collage technique in paintings. A combination of different materials was used together with painting on canvas.
After war Picasso's paintings are symbols of peace and diversity.
LINES FORM DIMENSIONAL SHAPES AND FIGURES
In my example it is 2-dimensional shapes. The difference between 2-dimensional shapes and 3-dimensional shapes is that first only have height and width while the second also have depth. In 2-dimensional drawing the depth can be created by use of lines of different thickness and darkness.
I used five images related to this statement :
Rainbow/color spectrum represents LINE
Abstract Form
Cubism used to describe DIMENSION
Sculpture as a process of shaping by using hands
Human Form
In the process of drawing and sketching I thought about my lines in their relationship to my character. Every word we use can be represented with different line, and all line we use in the drawing create a story. In my 2-dimensional drawing I used thicker and thiner line to show the illusion of depth. I used simple geometric shapes to represent images and be able to look at them from different viewpoints. Combination of different lines and techniques and use of geometric shapes in one deawing is related collage. It also creates the transition from reality to abstraction.
Creating of geometric shapes throughh the use of different angles, curves and squares. Rainbow/color spectrum represents line and also the use of color in his paintings. It is symbol of diversity and peace.
I distorted my images digitally through the use of copy/paste, crop, layers, brightness and contrast, use of filters, curves and smart sharpen

Monday, March 29, 2010

Final Project 1 drawing


Final Project #1

LINES FORM DIMENSIONAL SHAPES AND FIGURES


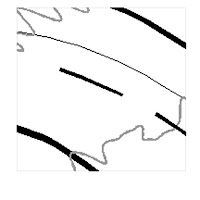
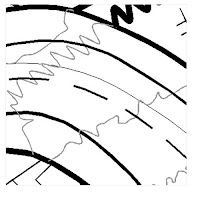
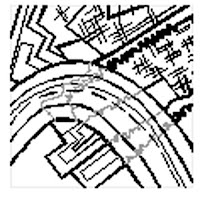
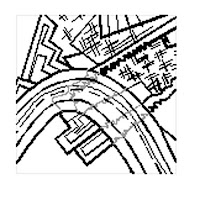
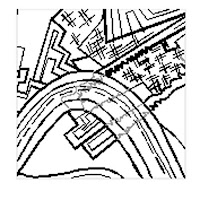
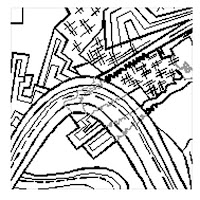
And some images I scanned from my original drawing
We are going to work on one of them in Autocad

Sunday, March 21, 2010

When I was drawing my line images, I was thinking only about my character Pablo Picasso and his style. I concentrated myself on Picasso's Cubism in general and his achievements as a sculptor. It was hard to put everything together at the beginning, but at the end of the process it became very interesting. I tried to connect all my lines and my images together. Each line I draw represents an action, process or expression. I don't want to use the word tracing because it's not what I was doing. It is based on my own understanding of a line. I looked at my photoshop images and my word maps, and only after that I tried to express them with lines. Most of my images not even close the same as the ones I did in photoshop.
Very interesting assignment.....

Wednesday, March 10, 2010

Working on my images and word maps

Every image from Photoshop should have a word map
Each line should represent a human action or photoshop command
Emotion or Physical action
Action of line - direction
Expression - emotion or physical action
I decided to do a word map and image together
Every command has a connection to the image and lines
Every line represents characteristics of an object
Images don't look like the ones I made in Photoshop
It's not tracing
Each image contains 3 line weights expressing the following idea:
-human action (how is the line expressed through the movement of your hand)
-human expression (how is the line expressed through human emotions)
- repetition of a line developed through human action and human expression)


Monday, March 8, 2010

03.08.2010


word map
word in the phrase

action of line - photoshop command - directional - emotion, physical action
expression

image - texture, template

Human action- step
Human Expression - sigh


----------------------------------------------------------------------

Shaping (Sculpture)
- Ceramics
- Clay
- Hands

Picasso's Sculpture:
Cubist, three- dimensional style
Expression of light, hapiness and hope

Dimension (Cubism)
-Synthetic Cubism
-Geometric Form
-Picasso

Cubism- the first abstract style of modern art
-In cubist style objects are broken up and analyzed in an abstracted form
-Objects are depicted from a multitude viewpoints
-Representation of a form in its purest way
-Geometry is a major part of cubism
-Shows many parts of the subject at one time, viewed from different angles, and reconstructed into a composition of planes, forms and colours.
-Picasso played with dimensions. He never gave the third dimension in his paintings
- Cubist Geometry is Picasso's own creation

Form
Geometric shape
Construction
Cube
angle, edge
abstract form
fragmentations
sum of destructions - reorganized from

Monday, February 22, 2010

02-22-2010

Project Due Date: Wed, March 17

Word - Mapping
Character - Lines (Hand)
5 min. on 11"/17" each image done on separate days
Vision Statement
5 words developed into a statement structure Adj./Adv. Verb Adj./Adv.
prinout 5 images in a row- written vision statement
each image is connected to a word from the statement
- a list of photoshop definitions of distortion/ filters
- scanned images of character line drawing

-----------------------------------------------------------
Collage - mix media, layering, flatten 3d space
Paint + Newspaper
landscapes, human figures, portraits, still life
--------------------------------------------------------------
Project 1 Thoughts
  • Correlation of words/phrases to images / feelings
  • Exploration of lines and images visually
  • Developing perception to open our perspective
  • Transition between Ideas
  • Extracting Lines/ Structure from images
  • Visual Representation of Words
  • Image Etymology (the study of words, meanings and their roots)
  • Anthropomorphisize of words to faces/people. Lines that represent people
  • Interpretation - construct words vs. images
  • Circulating process
  • Analyzing what we see into meanings
  • Finding a definition to a line with words and images
  • Sensing (mood/emotion) -how to express and define lines, perform lines
  • Translating - changing one form into another
  • Connecting with lines, images, expression, in order to project a purpose of significance to its context (character)
  • Learning new software (tools)
  • Linking a character's personalitity to words and images
  • Productively wasting time (process)

Wednesday, February 17, 2010

photoshop images

Working on Images in Photoshop


Lines Form Dimensional Shapes and Figures 5 images/5 words


1. Dimension (Cubism) - Synthetic Cubism, Geometric Form, Picasso


Cubism
- copy/paste
- crop
- filter - smart sharpen
- transform - warp
- filter - diffuse


Synthetic cubism
-copy/paste
- crop
- adjustments - black and white
- layers
- filter - smart sharpen
- filter - texture
- filter - cut out
- transform - rotate


Picasso
- copy/paste
- crop
- adjustments - layers
- black and white
- filter - cut out


Geometric Form
- copy/paste
- crop
- filter - craquelure
- adjustments - curves
- layers
- black and white
- filter - smart sharpen


2. Form (Abstract Form) - Modern Art, Geometry, Creation


Abstract Form
- copy/ paste
- crop
- image/adjustments/layers
- adjustments/ curves
- brightness/contrast
- filter - chrome


3. FIGURE (HUMAN FORM) - Contour, Proportion, Fashion


Human Form
- copy/paste
- crop
- transform - scale
- filter - sharpen
- filter - cutout
- image - adjustments
- black and white, curves
- layers, lights and shadows


Contour
- copy/paste
- crop
- black and white
- layers
- filter - sharpen


Proportion

- copy/paste
- crop
- image - adjustments
- black and white, curves, levels
- filter - cutout


Fashion
- copy/paste
- crop
- image/adjustments/curves
- brightness/contrast
- filter - sharpen edges
- transform - scale - warp
- filter - turbulent brush
- liquefy - bloat tool


4. Line (Rainbow) - Raindrop, Horizon Line, Rainbow Flag

Rainbow
-copy/paste
-crop
-layers
-black and white
-curve
-brightness/contrast
-transform-warp
-transform - perspective
-filter - ink outlines - brush strokes


Horizon Line
- copy/paste
- crop
- image - adjustments
- black and white
- hue saturation
- curves


Raindrop
- copy/paste
- crop
- adjustments - curves
- filter - water color
- brightness/contrast


Rainbow Flag
- copy/paste
- crop
- layers
- curves
- filter - brush strokes - dark strokes

5. Shape (Sculpture) - Ceramics, Clay, Hands


Sculpture
- copy/paste
- crop
- layers
- black and white
- filter - twirling


Ceramics
- copy/paste
- crop
- layers
- black and white
- curves
- filter - sharpen
- filter - texture


Clay
- copy/paste
- crop
- black and white
- filter - plastic


Hands
- copy/paste
- crop
- transform - distort
- transform - warp
- filter - spherize
- filter - twirling
- curves
- layers